
9 Basic Foam Roller Stretches to Relieve Your Back Pain
When it comes to foam rolling your back, there is a ton of misinformation out there. Let’s break down best practices for foam rolling with back pain. We’ll also dive into a few stretches with your foam roller that will help relieve both upper and lower back pain.
About this Guide to Foam Roller Stretches for Your Back
One of the most important things to know about back pain is that it’s often caused by over-tightening of nearby muscles. Here’s what you’ll find in this guide to foam roller stretches to relieve back pain:
Myths about foam rolling
The best foam roller exercises for your back
Information about how often to roll
Myths about Foam Rolling Your Back
First and foremost, it’s actually terrible for you to directly foam roll your lumbar spine with a regular foam roller. You’ll want a contoured roller if you plan on rolling your lumbar spine. You should only roll your lumbar spine if you have explicit instructions from a physical therapist or doctor.
Secondly, rolling directly on joints can actually increase your chances of injury. It puts stress on tissue that doesn’t flex the same way muscle does, which can cause pain and even injury. Instead, focus on targeting muscle groups that affect your back and posture. These meaty areas respond best to foam rolling. Also, always keep a neutral spine. By relaxing the below key muscle groups, you’ll also relieve your back.
For more foam rolling tips, check out our article on foam rolling basics.
The Best Foam Roller Exercises for Your Lower Back
As an expert in exercise for injury prevention and recovery, I understand the importance of the foam roller in relieving back pain. These 9 foam roller stretches for your back loosen up both back muscles and leave you feeling relieved.
Pipe Starfish Foam Roller Stretch for tight Chest Muscles
1. Relieve Chest Muscles with the Pipe Starfish
Sit on one end of the foam roller and lie down along the length of the roller. Make sure your head is supported on the roller as well. Cactus your arms and breath slowly and deeply as you relax your chest and upper back.
The goal is to eventually have your hands and elbows touching the floor on either side of your torso. If you can’t reach, don’t worry, just go as far as your body allows. Make sure to keep your elbows bent to 90 degrees and in line with your shoulders. Remember, don’t roll around with this exercise. Simply lie down and breathe.
Count: 30 to sixty seconds
Sets: 1 usually but can be 1-3
2. Relax your Lat
Rolling out your lats helps out everything from your neck to your spine when foam rolling for back pain. As a bonus, this exercise always helps alleviate stress in your shoulders and upper arms. Lie on your side with the foam roller under your ribs somewhere between the lowest part of your armpit to the bottom of your ribs. Start by rolling up and down from your rib to your armpit. Next, roll forward and backward slightly from the spine to the front of your ribs to find the most tender spot in addition to up and down. Once you find the most tender spot, stay there for 30 to 60 seconds before switching sides. Lastly, stop with the roller an inch or two below your armpit and bend and straighten the elbow as shown below. This creates cross-friction in the muscle fibers and helps them align better instead of being bunched up.
Again, this exercise requires you to be still and breathe, allowing your lats to stretch. The result is the relief of your entire back and shoulders.
Count: 30 to sixty seconds
Sets: 1 usually but can be 1-3

Robyn Fog shows the lat muscle foam roller cross-friction technique - arm extended

Robyn Fog shows the lat muscle foam roller cross-friction technique - arm bent

Glute and Piriformis Foam Roller Stretch
3. The Glute Figure 4 for Lower Back Relief
Sit perpendicular on the foam roller with your legs extended in front of you. With your hands on the floor behind you for support, cross your right ankle over your left knee. Bend your left knee until your left foot is flat on the floor and as close to you as is comfortable. Sit up tall and press your chest towards your shin. You should start to feel a deep stretch in your left hip. To deepen the stretch, lean to the right slightly (the side of the “up” knee) and wiggle back and forth until you find the most tender spot, then sit on it for 30 to 60 seconds before switching sides.
Reps: five back and forth movements or hold in the one most tender spot
Sets: 1-3

Thoracic Upper Back Foam Roller Movement
4. The Mighty Thoracic Roll
Give your upper back a break with this foam rolling exercise. Lie with your upper back on the foam roller and your knees bent with feet flat on the floor.
Place your hands behind your head to support your neck. Roll up and down between the base of your neck and the bottom of your ribs. If you find any tight spots - stay on them for 30-60 seconds, if not, roll back and forth slowly 5-10 times. Maintain a neutral spine, do not bend back over the roller - that will place too much pressure inside the spinal column. This is bad for everyone, especially if you have osteoporosis - you may even fracture your thoracic bones.
Reps: five back and forth movements
Sets: 1-3
5. Roll Out Your Neck
Most people have a tight neck due to a forward head posture. If your ears tend to sit in front of your collarbones, this is you. This tightness trickles down to your back, causing you pesky pain. Place the foam roller under your neck and lie with your feet on the ground. Slowly move your head side to side and gentle move over any “speed bumps.” Stop at any point of pressure for 30-60 seconds.
Reps: roll to each side 5-10 times slowly.
Sets: 1 to 3
Suboccipitals Foam Roller Stretch

Suboccipitals Foam Roller Stretch
6. Get Back Pain Relief from Rolling Out The Root of Your IT Band
Your IT band runs from your hips to your knee. As the IT band’s nearby muscles get tight, they pull on other parts of your body, causing pesky back pain. Don’t roll directly on your IT band, it can cause over-elastisticity and injury. Instead, aim for your TFL muscle.
Roll this muscle by putting the foam roller on the meaty part of your hip. Lay on your side until the foam roller is over the meat on the side of your hip. Slowly roll laterally across this small muscle by leaning side to side. You shouldn’t move far, since the muscle doesn’t take up much real estate. This releases tension to your legs, causing your IT band to chill out and relax your back.
Reps: roll to each side 5-10 times.
Sets: 1 to 3

TFL/IT Band Foam Roll Spanning - Start Position

TFL/IT Band Foam Roller Stretch - Finish Position
7. Release Back Tension with Shoulder Foam Rolling
A great foam roller stretch for your back after you’ve done a thoracic roll. Start with the foam roller just below your shoulder blades, the side of the roller should hit below your armpit. Place your hands behind your head and your feet on the ground. Slowly roll side to side across your shoulder blades. You should be rolling the muscle, not the bones, so make sure your foam roller is pushing into your mid-back muscles.
Reps: roll side to side 5-10 times
Sets: 1 to 3

Shoulder Blade Foam Roller Spanning - Start Position

Shoulder Blade Foam Rolling - Finish Position
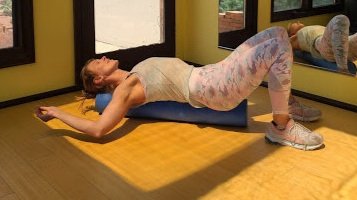
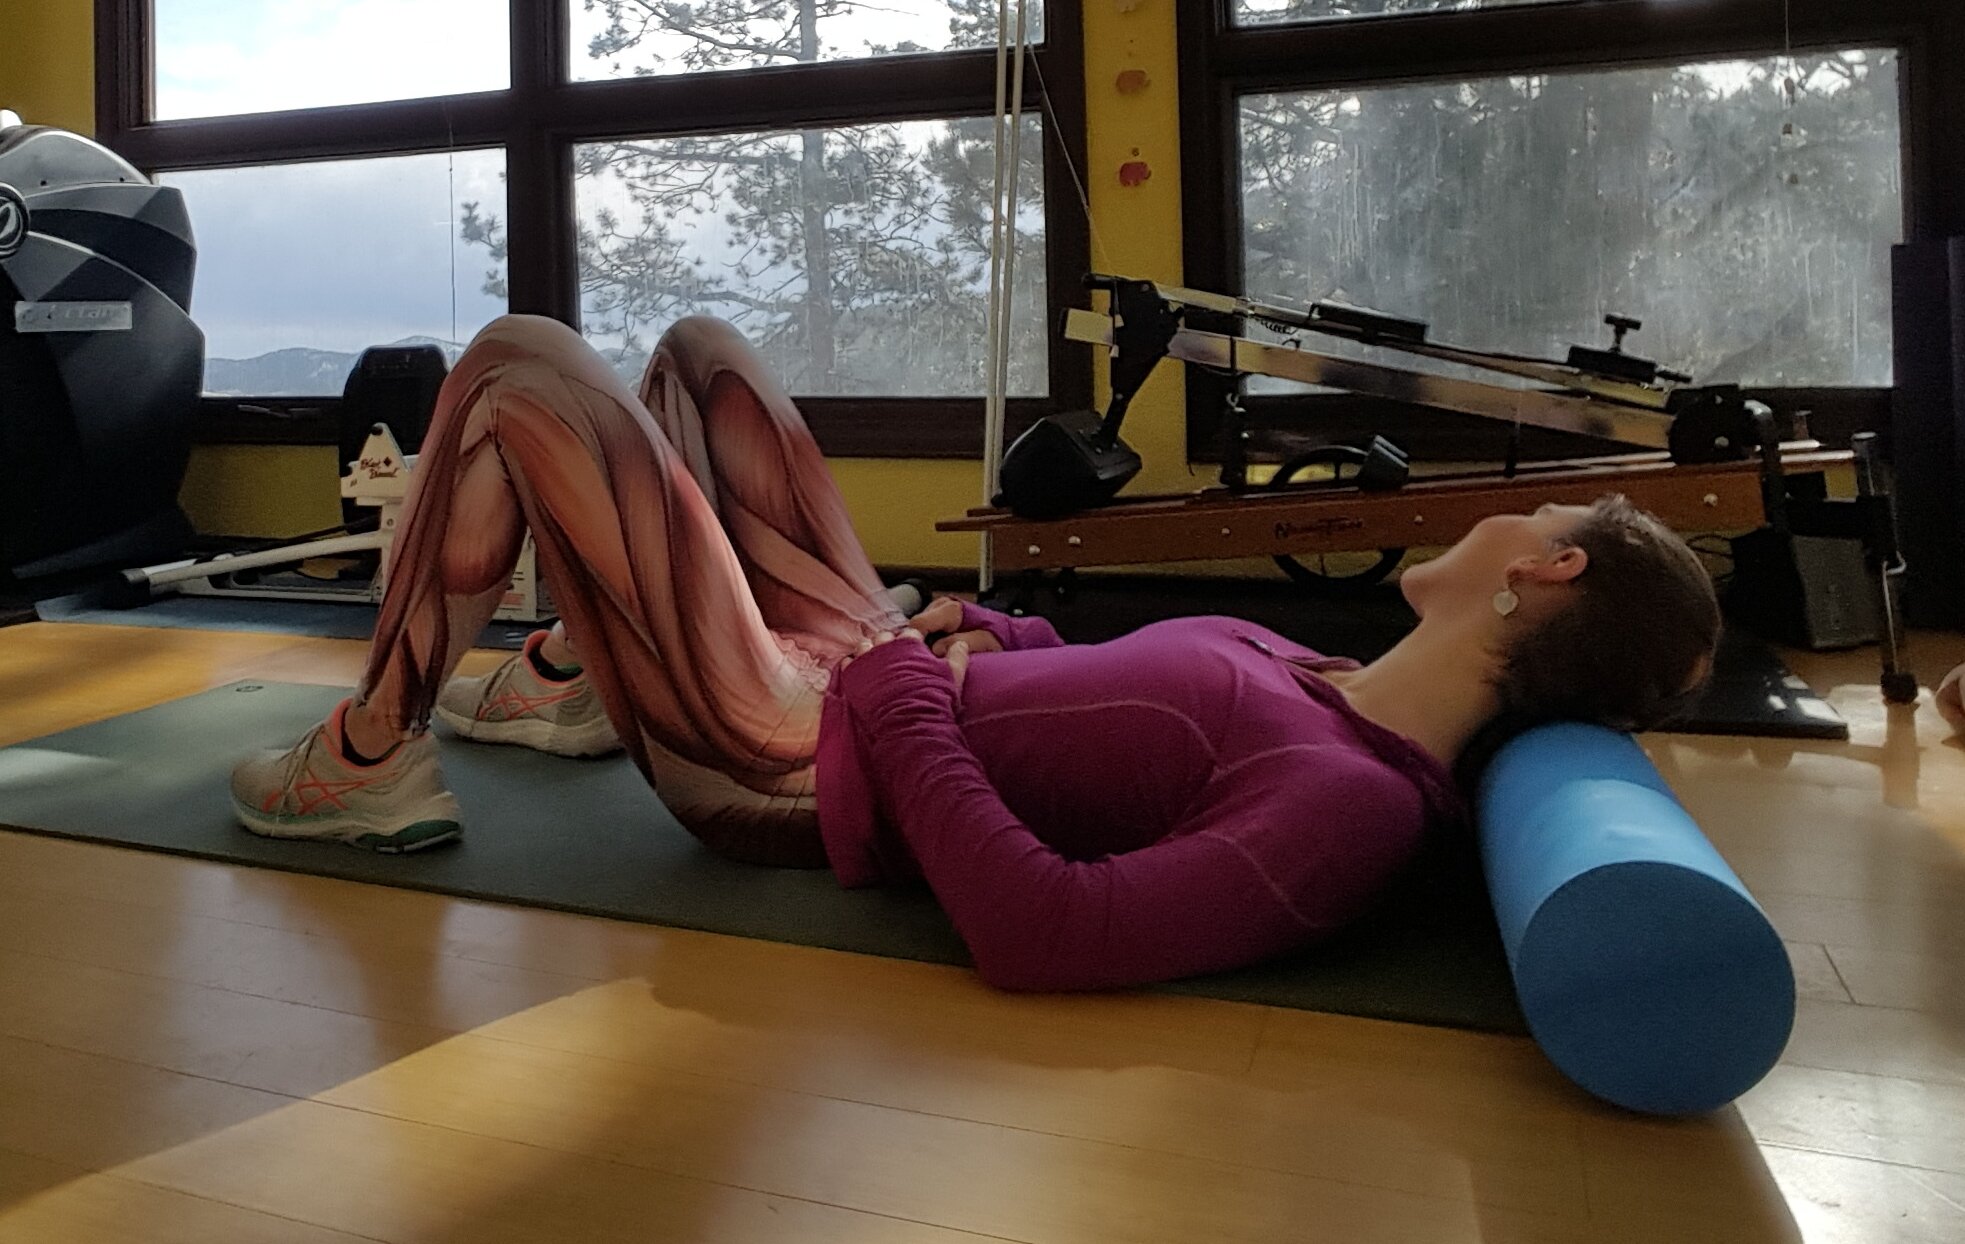
8. Relieve the Lower Back with the Psoas Foam Roller Stretch and Sacrum Roll
Start in the bridge position on the floor by keeping your back on the floor with your knees bent and feet flat. Lift your hips and slide the foam roller under your lower back just above your tailbone (some of the foam roller should be on your bum). Stay here for a minimum of 20-30 seconds. Breathe deep into your lower belly and allow your abs to fully relax on each exhale. This is a great stretch for your psoas muscle, a major contributor to lower back pain.
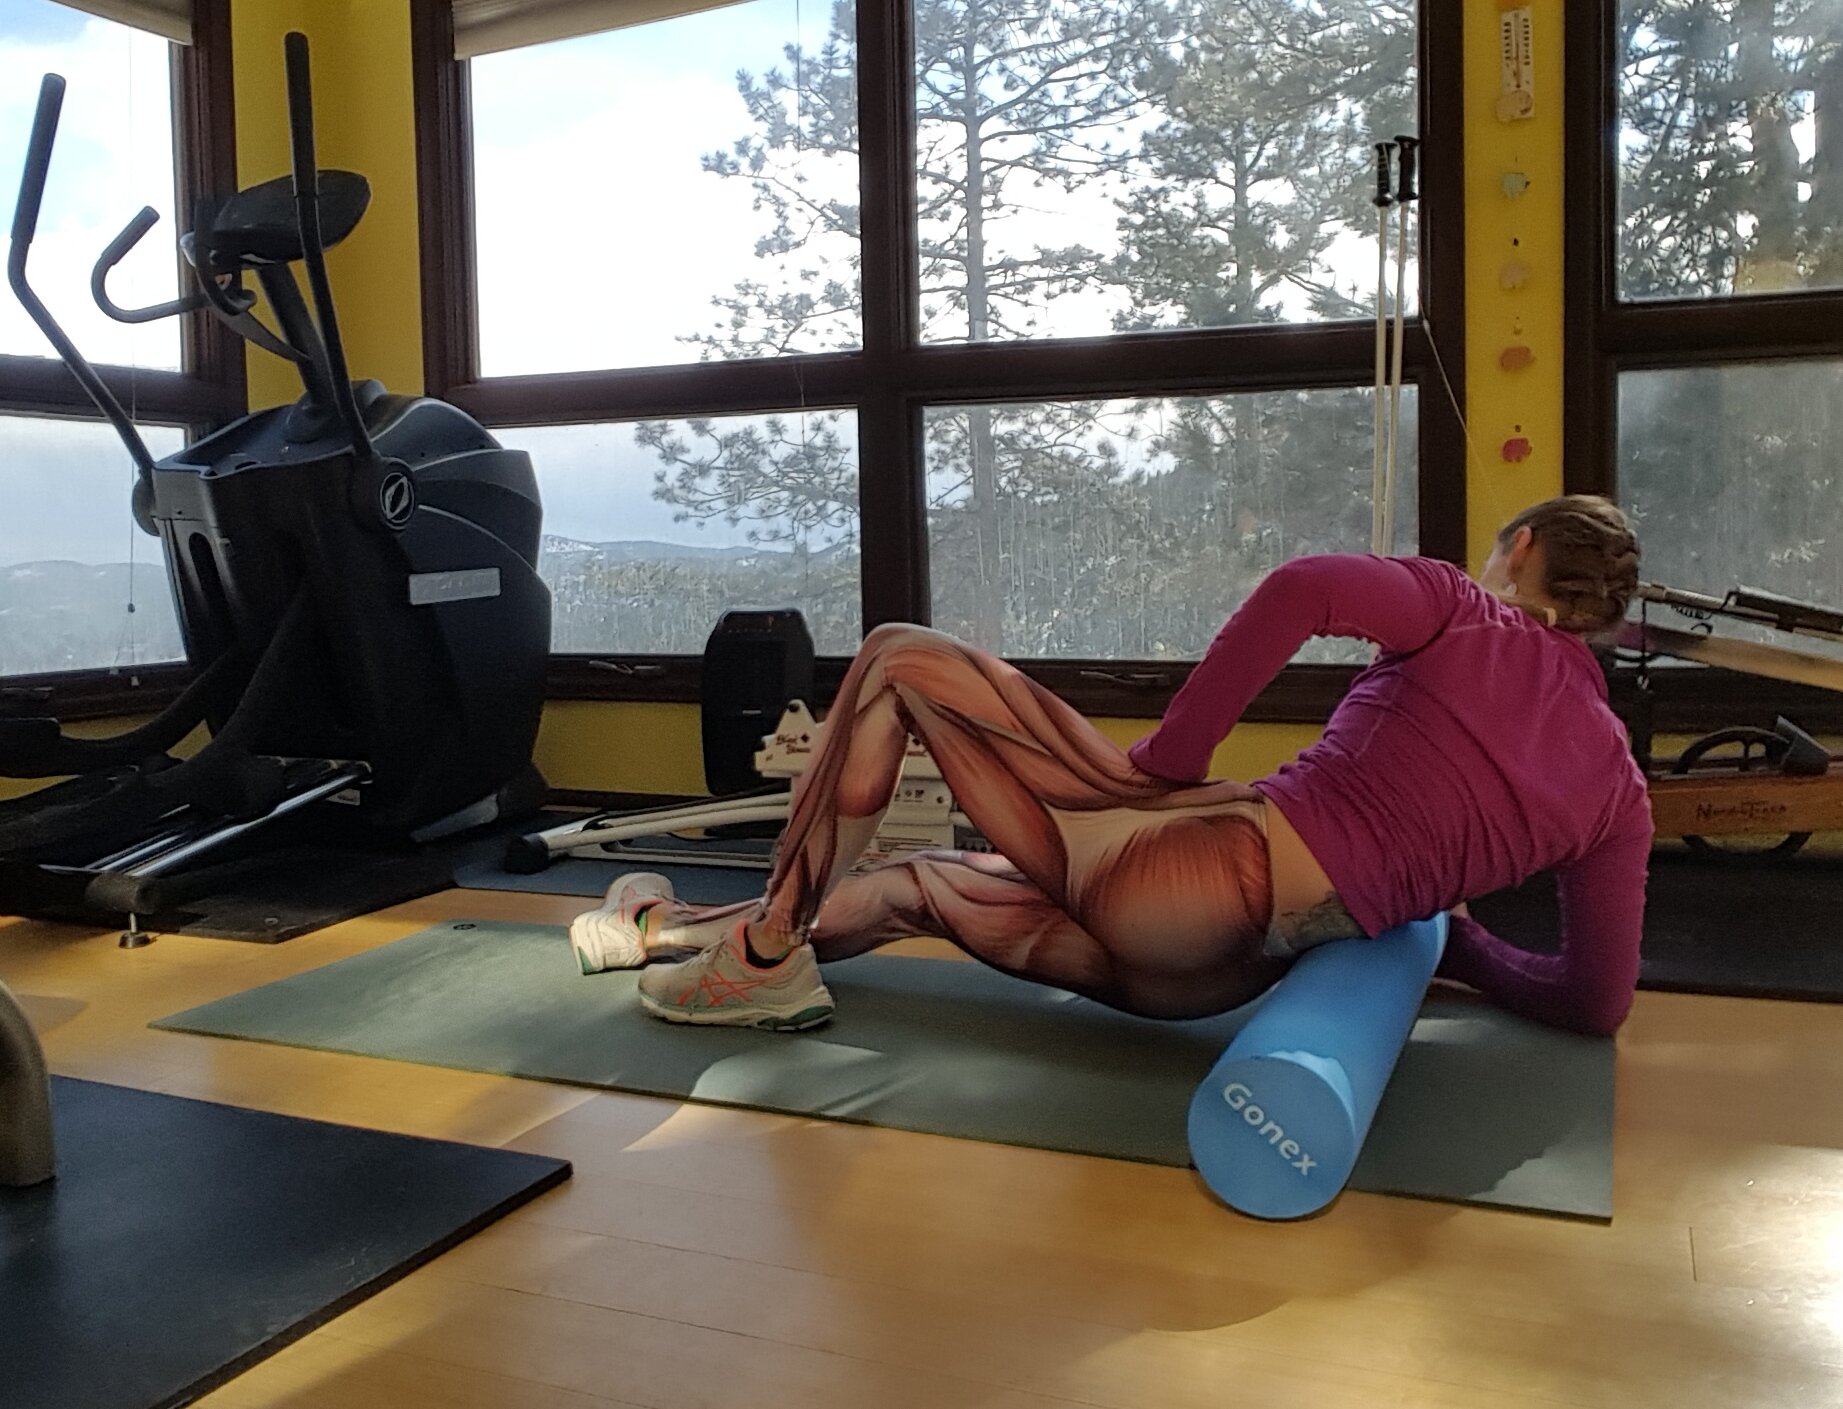
Then, lift your knees one at a time, keeping them bent, and bring both legs together with your feet in the air. Hold the ends of the foam roller for stability and gently rock side to side. This should be great on your outer hips. Be sure to keep your knees together. Only move as far as you are comfortable and remember, this should not feel like a workout.
Reps: roll to each side 5-10 times.
Sets: 1 to 3

Start Position for the Sacrum and Psoas Stretch - Stay here for 20-30 seconds before moving on to the next move.

The movement for the Sacrum Foam Roller Stretch - complete five to ten movements side to side
Lumbar Foam Roller Stretch - Do One Side at a Time!
9. Carefully Roll Your Lumbar
Using a foam roller on your lumbar is careful business. You should never roll over your spine. Rolling your spine is a quick way to earn yourself a back injury. Instead, carefully roll out one side of your lumbar at a time.
Put the foam roller down near your lumbar. Next, get on your side, taking great care to lay on the foam roller on your lumbar muscles only. Next, gently roll up and down to roll out your lumbar spine. Go slow and be certain to not roll over your spine directly. Aim to “sandwich” the muscles between your spine and the foam roller.
Reps: roll one side five to ten times, then switch sides
Sets: 1 to 3
How Often Can I Foam Roll My Back?
A good rule of thumb is to start small and work your way up. It’s okay to foam roll multiple times a day (3 times at most), but if you’re new to foam rolling, you may over-do it. Start by rolling out your back muscles once a day. Choose three to five areas to start.
Once a week, have a long session of foam rolling your back where you engage in each of these exercises. Be sure to drink plenty of water after you foam roll to help your body get rid of built-up toxins.
These basic foam rolling exercises provide complete back pain relief. For those new to foam rolling, do these foam rolling stretching exercises three times a week for best results. If you’ve been foam rolling for two months, feel free to do these exercises once to three times a day for maximum relief.